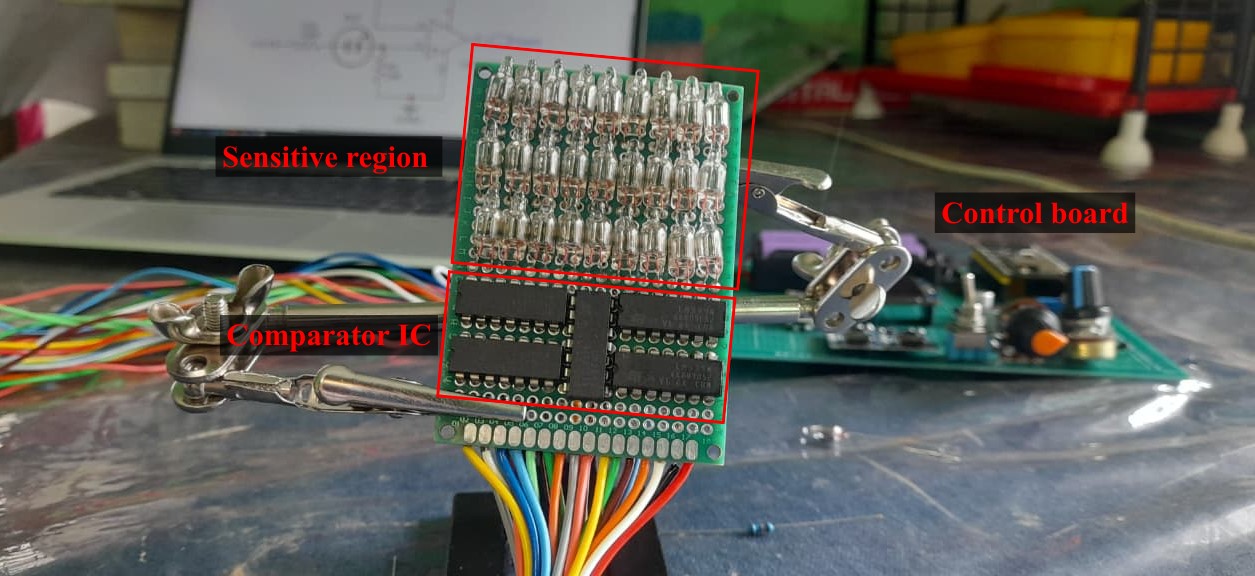
The completed physical detector assembly contained 27 individual elements.
EXPERIMENTAL HARDWARE / PARTICLE DETECTION
Particle detector.
A detector built from the component level upward.
I designed and physically built the detector hardware during my work connected to Beamline for Schools. The project involved a custom multi-element detector assembly, dense hand-wired electronics, extensive soldering, repeated debugging and several hardware iterations.
 PHYSICAL DETECTOR ASSEMBLY
03
THE BUILD
From loose components to a complete detector.
HARDWARE /
ELECTRONICS /
ASSEMBLY
Most of the work happened at the hardware level.
I built the physical detector assembly, arranged and connected the individual detector elements, created the supporting electrical connections and developed the hardware needed to turn the assembly into a testable system.
The final physical version used 27 detector elements. Much of the system was assembled manually, which made wiring discipline, connection reliability and debugging a major part of the project.
Electrical connections were assembled manually across the detector structure.
Roughly twenty-eight hours were spent soldering the detector hardware alone.
Wiring, electronics and physical assembly were repeatedly revised as problems appeared during testing.
04
HARDWARE
Dense electronics. Built by hand.
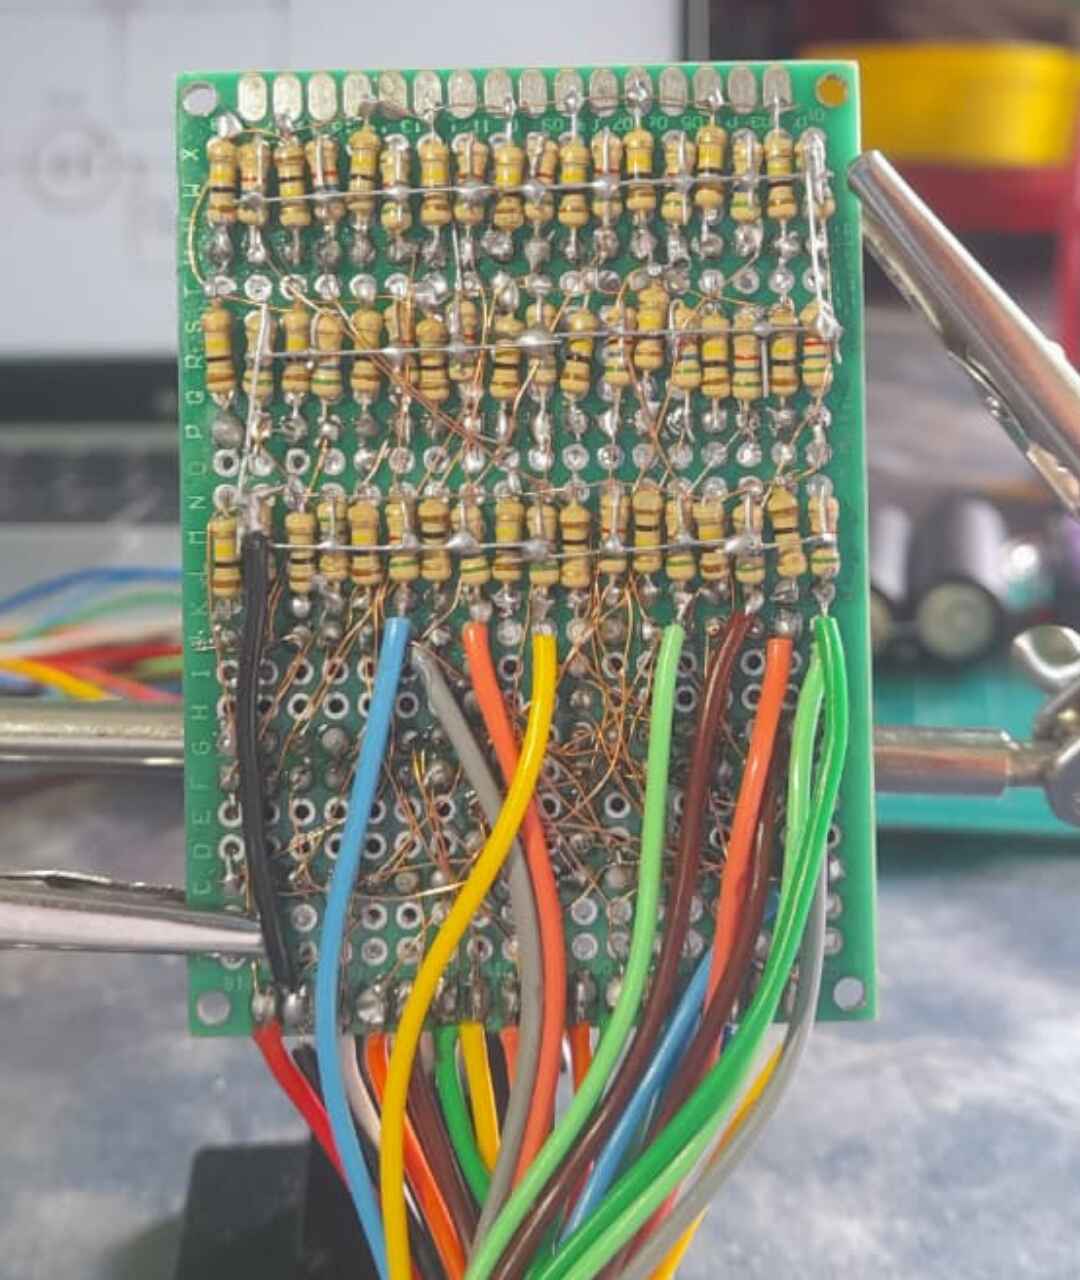
The detector became as much a wiring project as an electronics project.
The physical build required a large number of individual electrical connections packed into a relatively small assembly. I soldered the connections manually and routed the wiring around the detector structure.
That made mechanical layout and electrical reliability directly connected. A connection could be electrically correct on paper and still become a problem if the physical routing introduced stress, accidental contact or difficult access during debugging.
01
Multi-element physical detector assembly
02
Manually soldered electrical interconnections
03
Custom supporting electronics and signal connections
04
Repeated continuity checks, debugging and rewiring
05
Physical integration of the detector into a single testable unit
05
FABRICATION
Built one connection at a time.
The detector was not assembled from a finished commercial board.
I built the physical hardware manually. That meant placing components, forming connections, soldering large numbers of joints, checking continuity and then tracing individual faults when the assembled system behaved differently from the schematic.
The amount of manual work also exposed the limits of hand fabrication. As the circuit became denser, debugging individual connections became progressively harder and the wiring itself became another variable in the system.
Layout
Arranged the physical detector elements and planned how the electronics would fit around the assembly.
Assembly
Mounted the components and constructed the physical detector structure into a single unit.
Wiring
Created the electrical connections manually across the detector, resulting in a dense hand-wired system.
Soldering
Spent roughly twenty-eight hours soldering the physical detector and completing its large number of individual connections.
Debugging
Traced electrical problems, checked individual connections and repeatedly reworked sections of the assembly.
Iteration
Used the problems found in the handmade version to define what should change in later hardware, including cleaner PCB-based implementations.
06
ITERATION
The prototype showed what needed to change.
Building the detector physically was also a test of the manufacturing approach.
The handmade version proved that I could assemble the complete hardware, but it also showed how difficult a dense circuit becomes to inspect and debug when every connection is individually wired.
Later revisions therefore move toward a cleaner PCB-based implementation, with more controlled routing, repeatable connections and easier verification.
That transition is part of the project rather than a replacement for it. The hand-built detector established the physical system; the next version is about making the same engineering more reliable and reproducible.